Unless you’re creating a very simplistic mobile app whose functions and data remain on one screen, you’ll probably need to use multiple screens.
Let’s imagine, for example, that you have a shopping list app. One screen would be used to type the items to include on the list, while another might display all the items that you’ve added.
As a beginner, your first response might be to click the “Add Screen” button and create as many screens as you need.
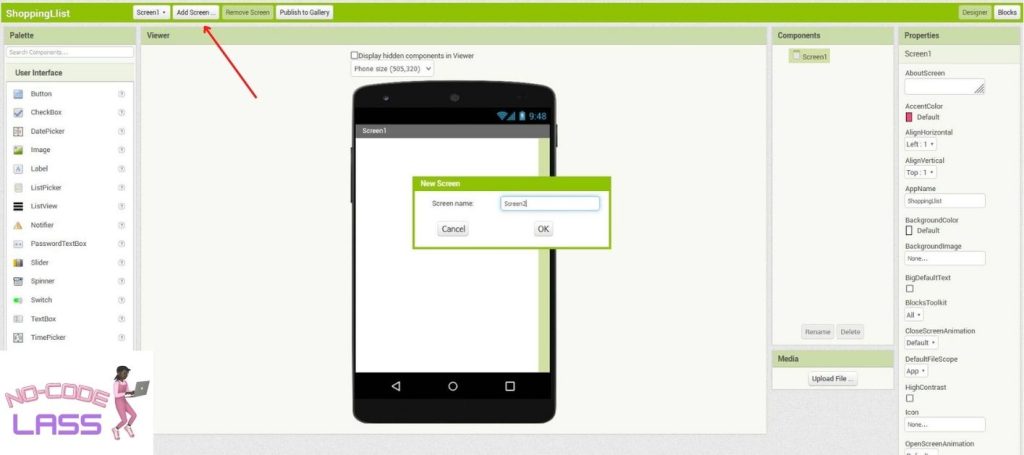
However, this isn’t a great solution. The more “physical” screens you have, the harder the device has to work – meaning, your app will quickly become a drain on the device’s memory. (Believe me, you don’t want that. The app will start crashing on your users!)
The better approach is to use “virtual” screens by toggling the visibility of horizontal and vertical arrangements.
What are horizontal and vertical arrangements?
They’re blocks that you can use to organize the layout of your app. A vertical arrangement stacks elements, like buttons or labels, on top of each other. A horizontal arrangement puts elements next to each other.
To use a vertical or horizontal arrangement, drag one from the “Layout” section of the Palette and drop it onto the Viewer. Then, you can drag and drop other elements, like buttons or labels, into the arrangement. You can also nest arrangements inside of each other to create more complex layouts.
But why are virtual screens better than physical ones?
By using virtual screens, you can manage the layout of your app in a much more efficient manner. Here are some of the main reasons why they’re preferable:
It’s easier to switch between screens
Navigating back and forth between apps, unlike with physical screens, is done by simply toggling the visibility of the arrangements.
They won’t slow down your computer or phone
Because virtual screens all take place on just one physical screen, they don’t require extra memory or processing power from the device running the app or the App Inventor server itself.
With physical screens, App Inventor has to load each one every time you switch, which slows down the software and makes it laggy.
Sharing data is easier
If you have information saved in TinyDB, for instance, with a virtual screen you can seamlessly share data between screens, since they’re all on the same “page.” Sharing saved data across physical screens, though obviously possible, is… let’s just say, not a walk in the park.
How to use virtual screens
As we’ve mentioned already, you use the visibility blocks to toggle the visibility of your arrangements. To start, set the length and width of all of your arrangement screens to “Fill Parent”. This ensures that they fill the entire space on the device.
Next, you’ll want to set all but your first screen to “invisible.” Then, you’ll go to the “Blocks” screen and, by using buttons, set the visibility of the other arrangements to “true” or “false” depending on what you want to show.
That’s all there is to it! Check out the screenshots below to see how this looks in practice.
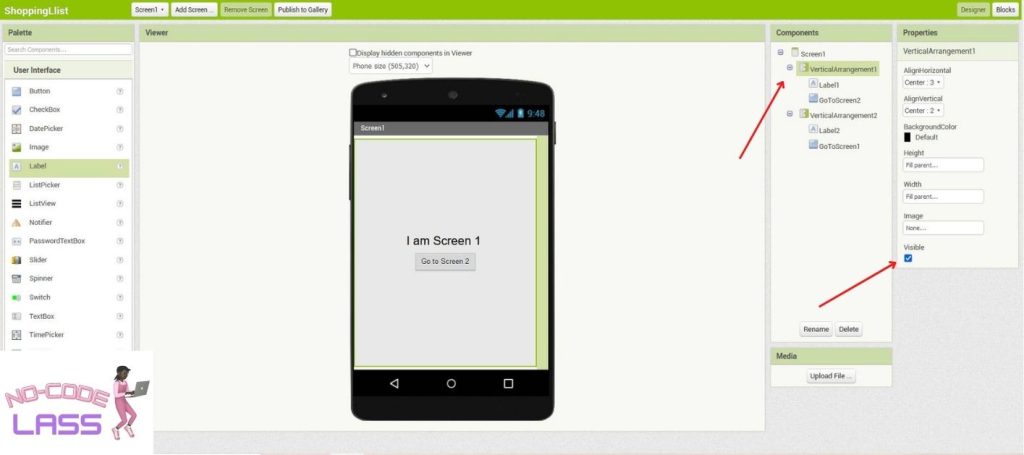
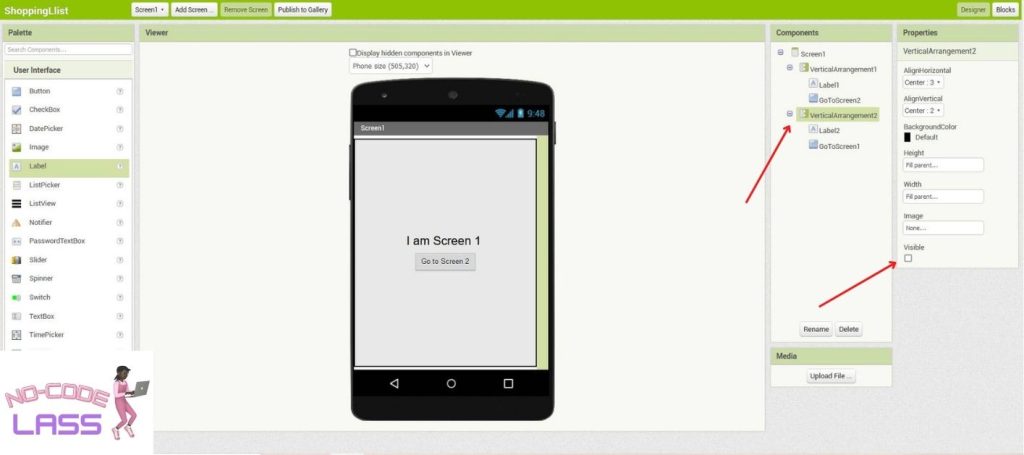
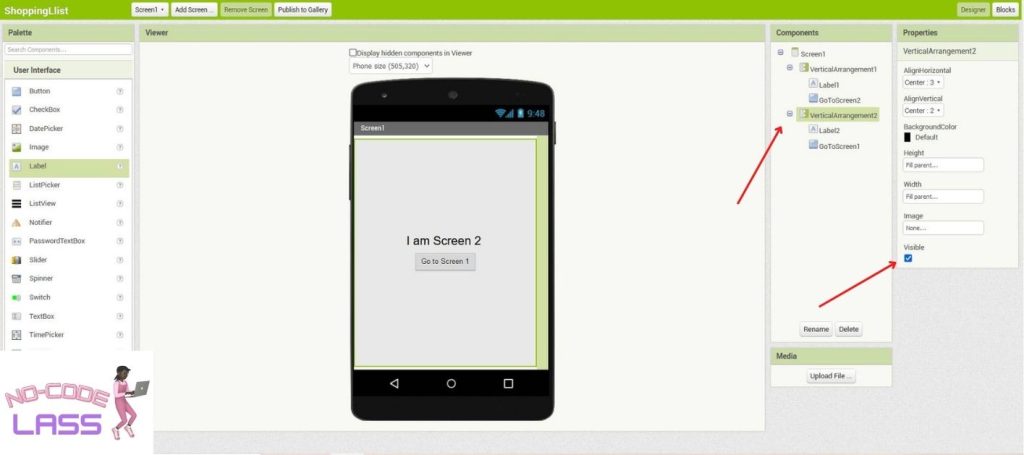
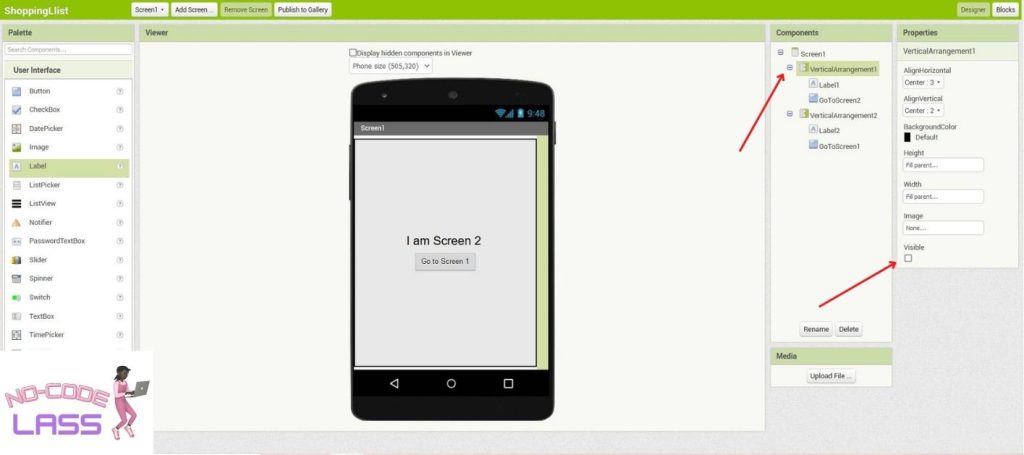
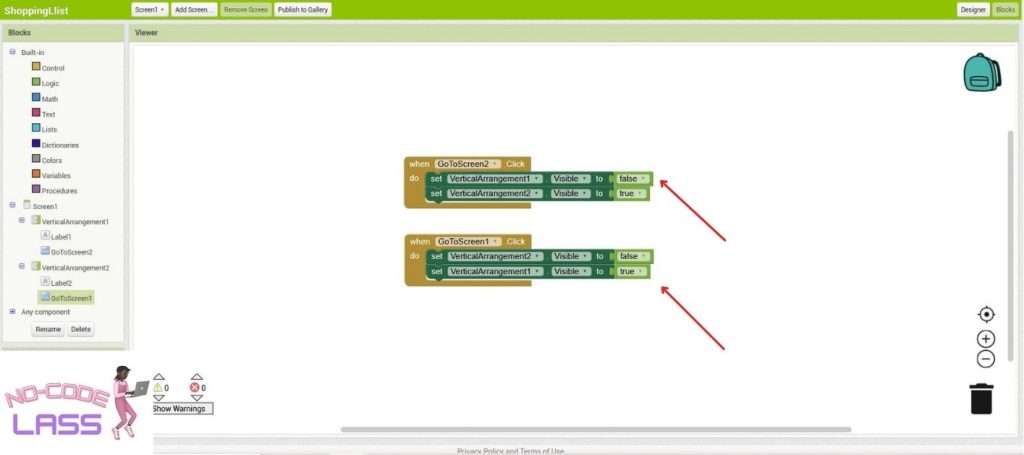
As you can see, it’s actually very easy to switch between virtual screens, and there’s no lag or delay in loading the next one. Try it out and see for yourself. Let me know how you get on!
